
How to create Fields in SparrowCRM?
Fields are how records store information. Every contact, company, and deal in SparrowCRM is a collection of fields. This page covers how to create new fields, the field types available, and settings like AI Autofill and dependencies.
For a broader introduction, see Understanding Fields. For the full list of fields available on each object, see Data Enrichment.
How to create a field
A field can be created from three places in SparrowCRM. All three open the same Create Field modal.
From account settings.
Click the settings icon in the top right corner and go to Account settings. Open Objects, pick one (Contacts, Companies, or Deals), navigate to Fields, and click Add Field.
From the object page.
Open the object from the left sidebar. Click the three-dot menu at the top right of the page and select Configure fields.
From the table view.
Open the object in table view. Click the + button at the right end of the column headers. Pick an existing field to display, or click Add column to create a new field.
Field creation is limited by role. For details, see [User Permissions].
Inside the Create Field modal
Every field starts with the same three inputs.
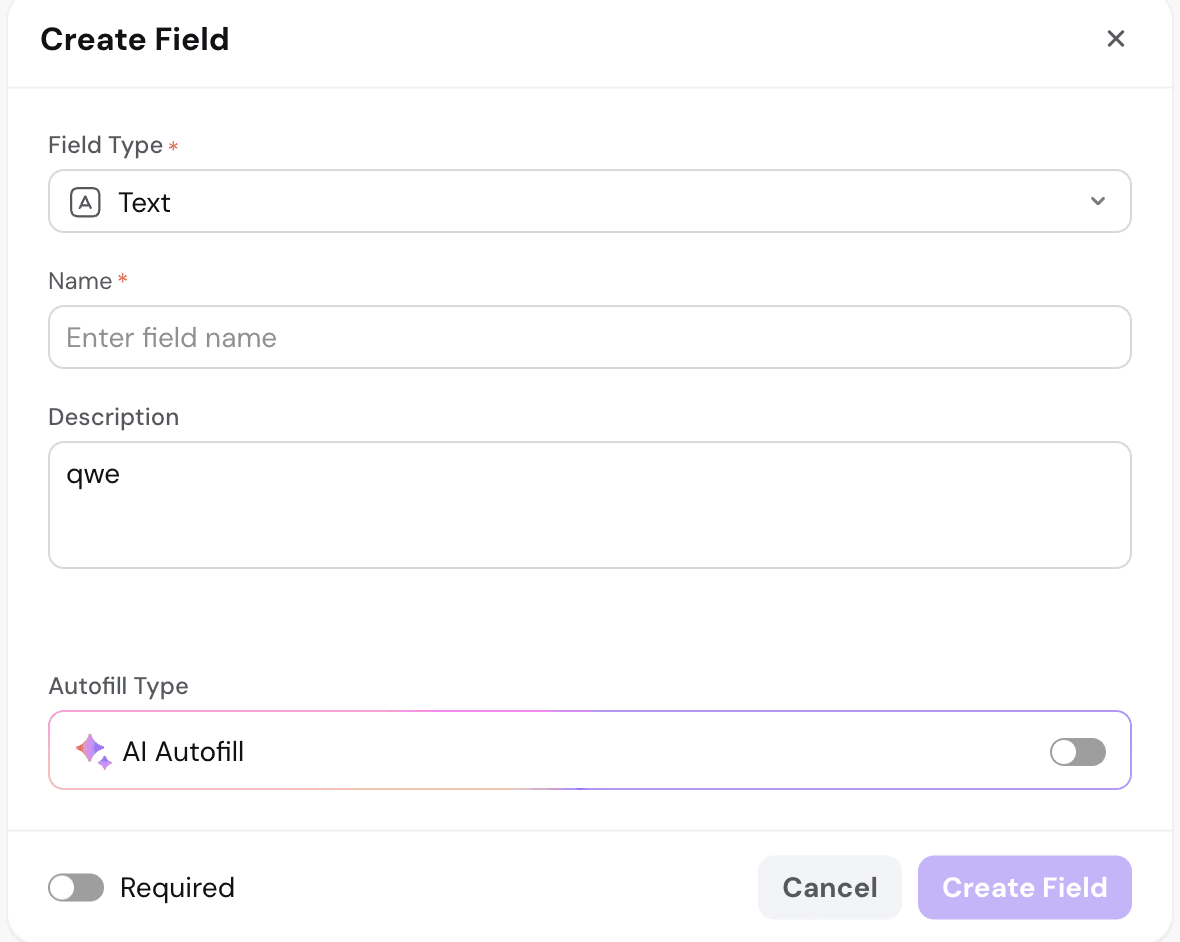
- Field Type (required). The kind of data the field will hold. Determines the settings shown below.
- Name (required). The label that appears on records, in views, and in filters.
- Description (optional). Context about what the field is for.
- Required (toggle, bottom of modal). When enabled, the field must be filled before a record can be saved.
Everything else in the modal depends on the field type.
Field types at a glance
Master reference for picking the right field type
Field type | What it stores | Use for |
|---|---|---|
Text | Free-form text, optionally auto-filled by AI. | Names, titles, short descriptions, notes, any unstructured input. |
Number | Whole numbers or decimals within a defined range. | Quantities, counts, scores, percentages, ratings, ages. |
Date | A calendar date, with configurable display format and restrictions. | Deadlines, contract dates, birthdays, event dates. |
Yes/No | A boolean value | Opt-ins, GDPR consent, decision flags, qualifier answers. |
A validated email address, optionally restricted to specific domains. | Work emails, personal emails, alternate contact addresses. | |
Rating |
AI Autofill
Text, Number, Select, and Multi-select fields include an optional AI Autofill setting.
When enabled, Zulie populates the field automatically instead of asking someone to fill it manually.
To turn it on, toggle AI Autofill in the Create Field modal. Two inputs appear.
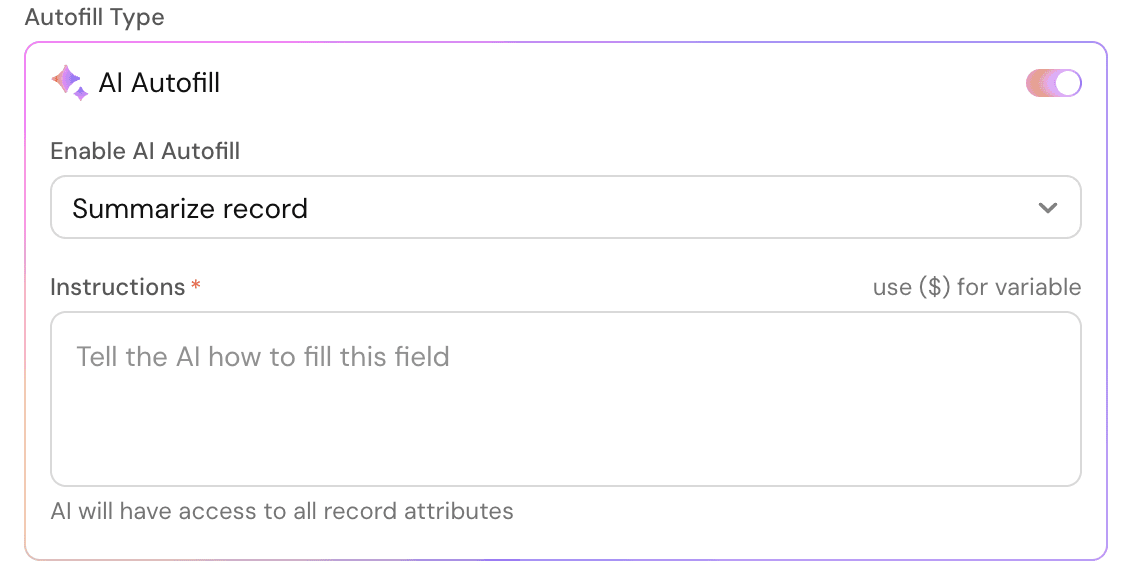
Enable AI Autofill (dropdown)
Pick the agent that will populate the field. Available agents depend on the field type.
Agent | What it does | Available on |
|---|---|---|
Summarize record | Generates a summary from record data | Text |
Research agent | Fills the field using research | Text, Number |
Classify record | Picks the right option based on record data | Select, Multi-select |
Instructions (required)
A natural language prompt telling the AI how to fill the field. Zulie has access to all record attributes when running.
For how AI fields work under the hood, see How AI fields are filled.
Field dependencies
Available on Yes/No, Select, Multi-select, and Stage fields.
Field dependencies control when a field appears on a record based on the value of another field.
Example: A Yes/No field called "Interested in a demo?" is created. If Yes is selected, a follow-up field called "Preferred demo date" appears on the record. If No is selected, the follow-up field stays hidden.
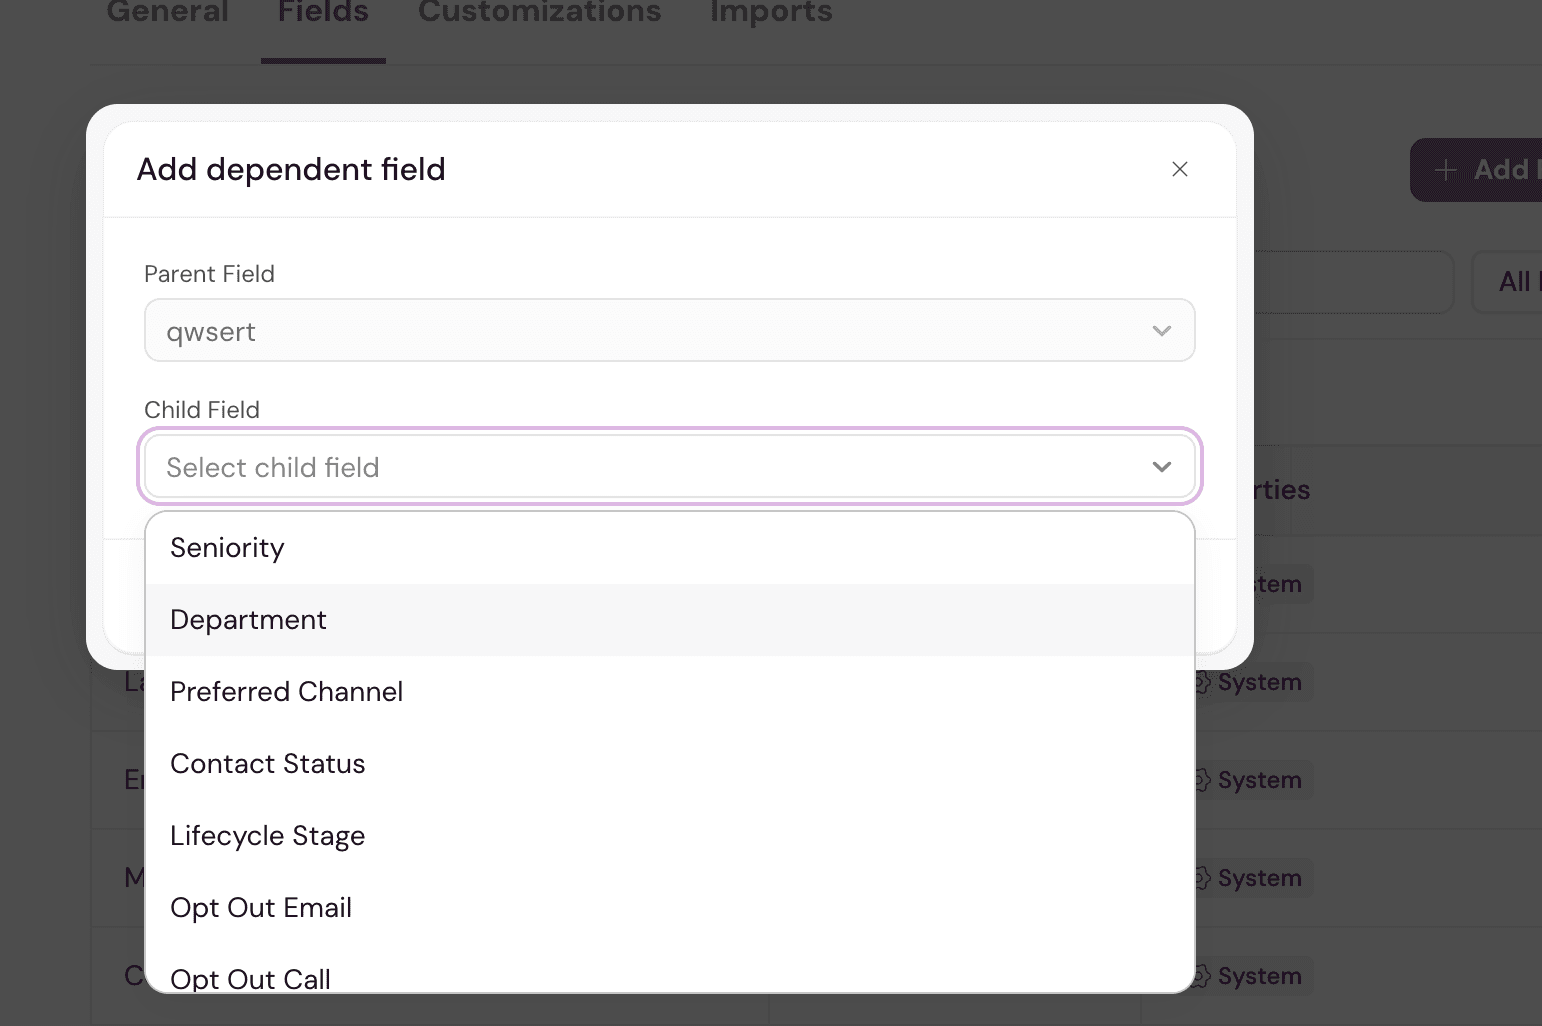
To set up a dependency, click + Add dependent field at the bottom of the Create Field modal. A separate modal opens.
- Parent Field. The field whose value controls the dependency.
- Child Field. The field that appears when the parent's value matches a condition. Pick from any existing field on the same object.
- Click Next to add the dependency.
Options for Select, Multi-select, and Stage
Select, Multi-select, and Stage fields need a list of options to pick from.
For Select and Multi-select, options are typed manually inside the Options input.
Turn on Allow users to add new custom options to let workspace members add new choices from a record.
Turn on Do not allow stage skipping to force records to move through stages in order.
Default values
Most field types support a default value. When set, every new record on the object is pre-filled with this value. The user can change it if needed.
Unique values
Number, Email, URL, Timestamp, Currency, User, Phone number, and Stage fields support an Allow unique values only setting.
When enabled, no two records can share the same value in this field, which helps prevent duplicates.
Domain filters
Email and URL fields support domain filtering.
- Allow all domains. No restriction.
- Allow only these domains. A whitelist. Only listed domains are accepted.
- Block these domains. A blacklist. Listed domains are rejected.
Once a field is created, it becomes part of the object across the workspace. It shows up on every record, and can be used to build views, filter records, run reports, trigger workflows, and query records through Ask Zulie.
Need help? Reach out to us at [email protected].